


























10 Beginner-Friendly Epoxy Resin DIY Ideas for Home
Discover 10 beginner-friendly epoxy resin DIY ideas you can make at home, from coasters and keychains to jewellery, trays, and decorative gifts.
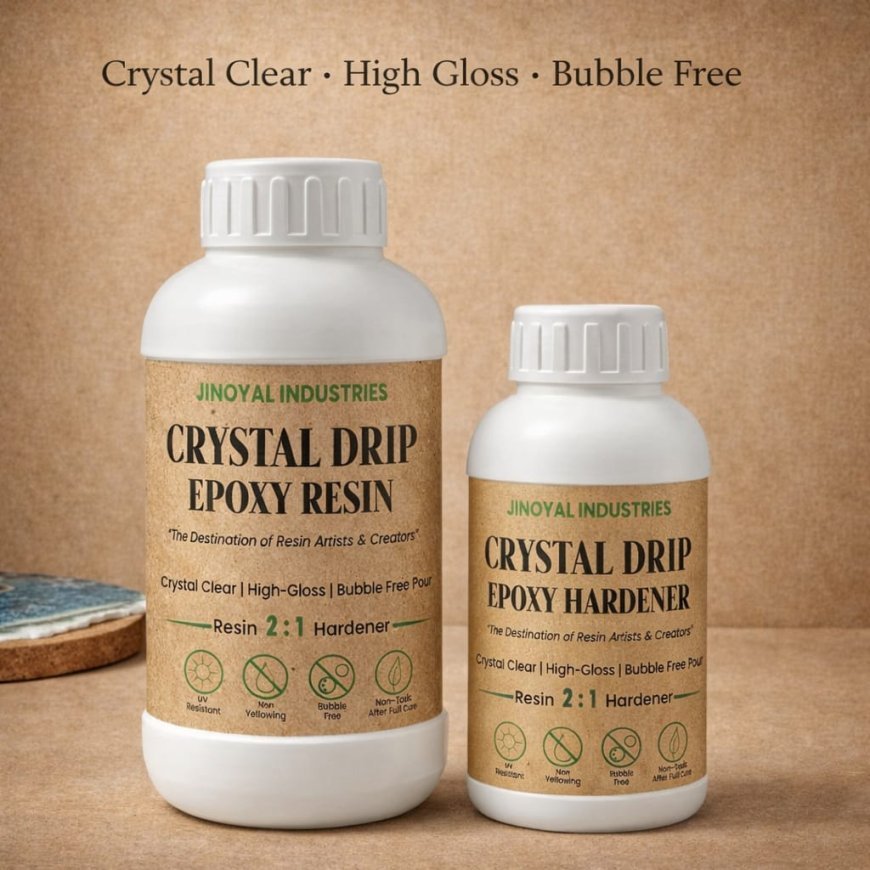
What Can You Make with Epoxy Resin at Home? 10 Beginner-Friendly DIY Ideas
Have you ever wondered what you can make with epoxy resin at home? From colourful coasters and personalised keychains to decorative trays and handmade jewellery, epoxy resin offers countless possibilities for creative DIY projects.
Epoxy Resin is a two-part material that typically consists of resin and a compatible hardener. When mixed in the correct ratio, the components react and gradually cure into a solid material. Its versatility, glossy finish, and ability to incorporate suitable pigments and decorative elements make it popular among resin artists, hobbyists, and DIY enthusiasts.
If you are a beginner, you do not need to start with complicated projects. Simple moulds, a small quantity of resin, and a few suitable craft supplies can help you learn the basics while creating attractive handmade items.
In this guide, we will explore 10 beginner-friendly epoxy resin ideas, the materials you may need, and practical tips to help you get started at home.
What Do You Need to Start Making Epoxy Resin Crafts?
Before beginning your first project, gather the necessary materials and check that they are compatible with your selected resin system.
Common Resin Art Supplies include:
-
Epoxy resin and its compatible hardener
-
Silicone moulds or suitable prepared surfaces
-
Measuring cups and mixing tools
-
Mica powder or compatible resin pigments
-
Glitter and decorative flakes suitable for resin
-
Appropriate protective gloves and eye protection
-
A clean, level workspace with suitable ventilation
Choose a resin intended for your project's size and thickness. Some products are designed for thin coatings, while others are formulated for casting. Always follow the manufacturer's mixing ratio, maximum pour depth, curing instructions, and safety guidance.
10 Beginner-Friendly Epoxy Resin DIY Ideas
1. DIY Epoxy Resin Coasters
<text color="secondary" size="sm">Difficulty: Easy</text>
Resin coasters are an excellent first project because they are relatively small and allow you to experiment with colour combinations.
You can create round, square, or scalloped coasters using suitable silicone moulds. Add compatible mica powder to produce metallic or pearlescent effects, or combine colours to create marble-inspired designs.
Materials required:
-
Suitable epoxy casting resin
-
Coaster mould
-
Compatible mica powder or resin pigment
-
Measuring cups and stirrers
How to make them:
-
Prepare the mould according to its instructions.
-
Measure and mix the resin and hardener correctly.
-
Add a small quantity of compatible pigment.
-
Pour the mixture into the mould.
-
Allow the piece to cure fully before demoulding.
Beginner tip: Start with two complementary colours rather than trying to create a complicated design immediately.
2. Personalised Resin Keychains
Personalised keychains are popular handmade gifts and can be customised with initials, names, colours, and decorative inclusions.
Alphabet moulds make it easier to create individual letters, while geometric and heart-shaped moulds offer additional design options.
Materials required:
-
Suitable epoxy resin
-
Alphabet or keychain moulds
-
Compatible pigments or glitter
-
Key rings and suitable hardware
How to make them:
-
Mix the resin and hardener according to the instructions.
-
Add your chosen colour or decorative material.
-
Pour carefully into the mould.
-
Allow the resin to cure completely.
-
Attach the keychain hardware using an appropriate method.
Beginner tip: Use a small amount of glitter or pigment so that the lettering remains clear and attractive.
3. Handmade Resin Jewellery
<text color="secondary" size="sm">Difficulty: Easy to moderate</text>
Epoxy resin can be used to create pendants, earrings, charms, and other decorative jewellery components. Small moulds allow you to experiment with colours and patterns without needing a large quantity of material.
Try combining transparent resin with dried decorative elements or compatible metallic pigments.
Materials required:
-
Resin suitable for jewellery casting
-
Small jewellery moulds
-
Compatible colourants
-
Suitable jewellery findings
Design ideas:
-
Minimalist transparent pendants
-
Gold-and-black statement pieces
-
Floral-inspired charms
-
Colourful geometric earrings
Beginner tip: Ensure that the resin is fully cured before handling or assembling the pieces. Follow the product's safety and suitability instructions for its intended use.
4. Decorative Resin Trays
Resin trays are useful decorative accessories for displaying jewellery, perfumes, or other suitable household items.
You can use a tray mould to create a glossy finish with contrasting colours, metallic effects, or abstract patterns.
Materials required:
-
Resin suitable for the tray's dimensions
-
Tray mould
-
Compatible pigments
-
Optional decorative flakes
How to make them:
-
Prepare the mould on a level surface.
-
Measure and mix the resin components.
-
Add your chosen colours.
-
Pour within the resin's specified depth limits.
-
Allow the tray to cure fully before removing it.
Beginner tip: Check the product's maximum pour depth. A large tray may require a formulation designed for casting or multiple controlled layers.
5. Resin Photo Frames
A handmade resin photo frame can make a personalised gift for birthdays, anniversaries, or other special occasions.
Depending on the mould design, you can create heart-shaped frames, circular frames, or decorative borders with coloured resin.
Materials required:
-
Suitable resin
-
Photo-frame mould or compatible frame base
-
Pigments or decorative inclusions
-
A photograph suitable for the intended design
Design ideas:
-
Pearl-white frames with gold accents
-
Blue-and-white ocean-inspired frames
-
Floral-themed decorative borders
-
Personalised frames with initials
Beginner tip: Check that the photograph and any adhesive or backing material are compatible with the resin. Test a sample first to reduce the risk of discolouration or unwanted bubbles.
6. Resin Bookmarks
Resin bookmarks are lightweight decorative projects that are suitable for experimenting with thin moulds and simple colour combinations.
You can create transparent bookmarks with dried flowers, subtle shimmer, or colourful patterns.
Materials required:
-
Resin suitable for thin castings
-
Bookmark mould
-
Compatible pigments or decorative inclusions
-
Suitable ribbon or tassel
How to make them:
-
Prepare a clean, level workspace.
-
Mix the resin components correctly.
-
Add a small amount of colour or decorative material.
-
Pour carefully into the mould.
-
Cure fully before removing and adding a tassel.
Beginner tip: Choose a resin designed for the thickness of the bookmark and avoid making the finished piece unnecessarily thick or heavy.
7. Resin Paperweights
Decorative resin paperweights can be made in clear or coloured designs. They are suitable for experimenting with embedded decorative objects and layered colour effects.
For example, you could create a transparent paperweight with coloured flakes or a simple geometric pattern.
Materials required:
-
Casting resin suitable for the required thickness
-
Appropriate mould
-
Compatible pigments or inclusions
Beginner tip: Paperweights may require thicker pours than small jewellery pieces. Use a resin formulated for the intended casting depth, and follow the recommended layer thickness and curing conditions.
8. Resin Wall Art
If you want to experiment with larger creative designs, resin wall art offers plenty of opportunities to explore colour, movement, and texture.
You can create abstract patterns, ocean-inspired scenes, or metallic effects on a properly prepared compatible surface.
Materials required:
-
Resin intended for coating or artwork
-
Compatible pigments
-
Suitable prepared panel
-
Appropriate protective equipment
Design ideas:
-
Blue-and-white ocean patterns
-
Gold metallic accents on a dark background
-
Abstract colour blending
-
Minimalist pearl and neutral shades
Beginner tip: Practise on a small panel before moving to a larger artwork. Large surfaces require careful preparation, suitable ventilation, and control of the resin's working time.
9. Resin Decorative Bowls and Trinket Dishes
Decorative bowls and trinket dishes can be used to organise small accessories or display decorative objects.
Choose a mould and resin system suitable for the desired shape and casting thickness. Metallic pigments and complementary colour combinations can create attractive visual effects.
Materials required:
-
Suitable casting resin
-
Bowl or dish mould
-
Compatible colourants
-
Optional decorative flakes
Beginner tip: Treat these items as decorative objects unless the exact resin product and finished application are explicitly approved for food contact or other intended uses. Do not use ordinary craft resin for serving food.
10. Handmade Resin Gifts
One of the most enjoyable ways to explore resin art is to create personalised gifts.
You can combine ideas from the previous projects to make coordinated gift sets featuring matching coasters, keychains, pendants, or decorative trays.
Gift ideas include:
-
Personalised initial keychains
-
Matching coaster sets
-
Decorative jewellery
-
Custom photo frames
-
Resin bookmarks
-
Special-occasion keepsakes
Beginner tip: Choose a simple colour theme and repeat it across the different pieces. This creates a coordinated look without requiring complicated techniques.
Which Epoxy Resin Is Best for Beginners?
Choosing the correct resin is important for achieving a good result.
Epoxy Resin for Small Crafts
For keychains, pendants, and small moulded pieces, choose a casting resin specifically designed for those applications.
Crystal Clear Epoxy Resin
Crystal Clear Epoxy Resin is useful when transparency is important, such as for clear pendants, decorative inclusions, and selected casting projects. The final clarity depends on correct mixing, curing conditions, material compatibility, and the product formulation.
Resin and Hardener Mixing Ratio
Always follow the exact mixing ratio provided by the manufacturer. Ratios may differ between products and may be specified by weight or volume.
Incorrect proportions can cause sticky surfaces, soft spots, or incomplete curing.
Bubble Control
Mix slowly and thoroughly, avoiding unnecessary air introduction. Use only bubble-removal methods approved for your particular resin and follow the relevant safety precautions.
Yellowing Resistance
If you are making transparent or light-coloured objects, consider a resin with documented yellowing-resistance properties. No formulation should be assumed to remain perfectly clear indefinitely under all conditions.
How to Use Mica Powder and Glitter in Resin Crafts
Mica powder and compatible glitter are popular additions for creating colourful decorative effects.
Mica powder can create pearlescent and metallic-looking finishes, while glitter adds visible sparkle.
For better results:
-
Prepare the resin and hardener according to the instructions.
-
Add a small amount of compatible pigment or glitter.
-
Mix until the colour is evenly distributed.
-
Test the mixture in a small sample.
-
Pour within the recommended depth and allow it to cure fully.
Avoid adding excessive amounts of decorative materials, as they can affect the appearance, flow, and sometimes the curing performance of the resin.
Essential Safety Tips for Resin Art at Home
Although epoxy resin is useful for creative projects, uncured resin and hardener can present health risks. Beginners should establish safe working habits from the beginning.
-
Work in an area with ventilation suitable for the product.
-
Wear the gloves and eye protection specified by the manufacturer.
-
Avoid skin and eye contact with uncured resin and hardener.
-
Follow the product's safety data sheet and handling instructions.
-
Keep resin materials away from children and pets.
-
Do not use food containers or kitchen utensils for mixing resin.
-
Avoid heating resin or using a flame unless the method is explicitly approved and appropriate safety precautions are followed.
-
Allow the material to cure fully before handling the finished piece.
-
Follow local instructions for disposing of leftover resin and containers.
For beginners, it is best to start with a small project and learn the manufacturer's procedures before attempting large pours.
Frequently Asked Questions (FAQs)
1. What can beginners make with epoxy resin at home?
Beginners can try coasters, keychains, pendants, bookmarks, photo frames, small trays, and decorative ornaments. Start with a small mould and a resin formulation designed for the intended project.
2. Is epoxy resin art difficult to learn?
Basic resin projects are accessible to beginners, but good results require accurate measuring, thorough mixing, safe handling, and suitable curing conditions. More complex projects may require additional practice.
3. What supplies do I need for my first resin project?
You typically need compatible resin and hardener, a suitable mould, measuring and mixing tools, optional pigments, and the protective equipment specified by the manufacturer.
4. Can I use mica powder in epoxy resin?
Yes, many mica powders are suitable for decorative epoxy resin applications. Check the pigment's intended use and begin with a small quantity to evaluate the colour and curing performance.
5. How long does epoxy resin take to cure?
Curing time varies by formulation, temperature, batch size, and project thickness. Follow the manufacturer's instructions for working time, demoulding time, and full cure.
6. Can I make resin crafts in my bedroom?
A bedroom is generally not an appropriate workspace unless it meets the product's ventilation and safety requirements. Choose a dedicated, well-ventilated area and follow the resin manufacturer's safety data sheet.
7. Where can I buy epoxy resin and resin art supplies in India?
You can explore specialist craft-material suppliers and online stores. Jinoyal Industries Pvt. Ltd. offers creative materials through its website at https://www.jinoyal.com/. Check individual product listings for current availability, specifications, and suitability.
Final Thought
Making epoxy resin crafts at home is a creative way to produce personalised accessories, decorative objects, and handmade gifts. From simple coasters and keychains to jewellery, photo frames, and wall art, there are plenty of beginner-friendly projects to explore.
Start with a suitable Epoxy Resin Kit, compatible Resin Art Supplies, and a small mould. Experiment with mica powder, glitter, and colour combinations while learning how to measure, mix, and cure resin correctly.
The most important factors are choosing the right resin formulation, following the manufacturer's instructions, and maintaining safe working practices.
With patience and practice, you can develop your resin art skills and create unique DIY pieces for your home, gifts, or creative business.
Explore resin art materials and other creative supplies at Jinoyal Industries Pvt. Ltd.: https://www.jinoyal.com/
Get in Touch
website : https://www.jinoyal.com/
E mail id : Support@jinoyal.com
Contact No : 9289666435
Insta id : https://www.instagram.com/jinoyal/
What's Your Reaction?
 Like
0
 Dislike
0
 Love
0
 Funny
0
 Angry
0
 Sad
0
 Wow
0