
























What Really Happens During a Professional Hand Car Wash
A professional hand car wash carefully cleans every part of your vehicle, helping remove dirt, protect the paint, and leave your car looking fresh and polished.

Most people only see the beginning and the end of a professional wash. The car arrives dusty, and an hour later it rolls out gleaming. The middle part, where the real skill lives, usually stays out of sight.
Understanding that middle part helps you judge quality. It also explains why a careful wash costs more than a quick tunnel and why the results last longer.
If you have ever searched for a magic hand car wash in West Melbourne and wondered what you are actually paying for, this walkthrough of a typical visit will give you a clear picture of each stage and the reasoning behind it.
Step One: Inspection Before Any Water Touches the Car
A good technician starts by walking around the vehicle. They look for loose trim, cracked seals, chips in the paint, and areas with heavy contamination such as tar or bird droppings. This habit protects both sides. The car is washed with the right level of care, and any existing damage is noted before work begins.
Doors, windows, and the fuel flap are checked and closed. Aerials and mirrors are positioned so they will not catch a towel. It takes only a couple of minutes, but it prevents most of the small accidents that happen in rushed washes.
Why Pre-existing Damage Matters
A scratch that was already there should not be blamed on the wash, and a loose piece of trim should not be pulled off by a mitt. Noting these details first keeps everyone on the same page and shows that the team takes responsibility seriously.
Step Two: Rinsing Away Loose Dirt
The first contact with water is purely about removing grit. A steady rinse, usually with a pressure washer set to a sensible level, lifts sand, dust, and mud from the panels without touching them.
This step is more important than it sounds. If heavy grit stays on the paint when the mitt first touches it, that grit becomes sandpaper. A thorough rinse removes a large portion of that risk before any contact begins.
Wheel arches and the lower sides of the car get extra attention here, since that is where most road grime collects.
Step Three: Foam and Dwell Time
Many professionals then apply a layer of thick foam. The foam clings to the surface and softens the remaining dirt. It also breaks the bond between grime and paint so that less pressure is needed later.
What Dwell Time Does
Letting the foam sit for a short period allows the cleaning agents to work. This is called dwell time. The technician usually keeps it brief and never lets foam dry on the surface, especially on a warm day.
A second rinse then removes the foam and the loosened soil, leaving a much cleaner surface for the contact wash.
Step Four: The Contact Wash
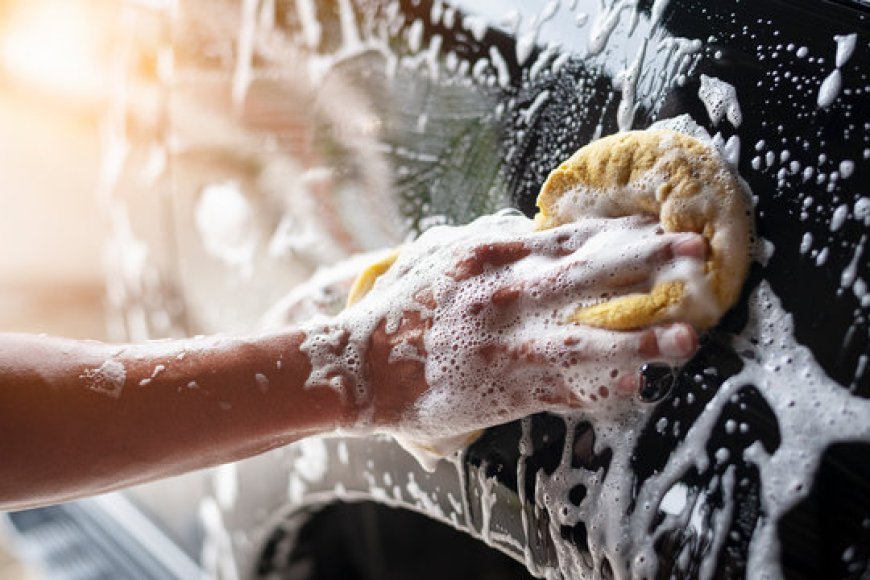
This is the stage most people picture when they imagine a hand wash. A soft mitt is dipped into a bucket of car shampoo and passed gently over the paint in straight lines, not circles.
The Two Bucket Method
One bucket holds clean shampoo. The other holds rinse water, usually with a grit guard at the bottom. After each panel, the mitt is rinsed in the second bucket before returning to the first. That way the dirt taken off the car stays out of the shampoo.
Professionals work from the roof down. The bonnet and boot follow, then the upper sides, and finally the lower sections, which carry the most grime. Rushed or careless washing usually skips this order.
Step Five: Wheels, Tyres and Arches
Wheels deserve their own tools. Brake dust contains small metal particles that can scratch paint if carried over on a mitt. For this reason, wheel brushes, mitts and buckets are kept separate from those used on the body.
A wheel cleaner designed for the specific finish is sprayed on and given a short time to work. Brushes reach between the spokes and inside the barrel. Tyres are scrubbed to lift old dressing and road film, then rinsed thoroughly.
The wheel arches are the last place people look, yet they hold plenty of mud. Cleaning them keeps debris from flicking back onto the paint after the wash.
Step Six: Rinsing and Drying Without Streaks
A final rinse removes all traces of shampoo. Many professionals use a slow, sheeting flow of water without a nozzle, which pulls most of the water off the paint and leaves less to dry.
Drying is where good results are made or lost. Clean, soft microfibre towels are used to blot the water instead of dragging it. Some teams also use filtered blowers to push water out of mirrors, badges and door handles, where it would otherwise dribble down and leave a streak.
Door jambs, boot edges and the area around the fuel flap are wiped dry as well. These places show water marks long after a wash if they are ignored.
The Glass and Final Wipe
Windows are cleaned inside and out with a proper glass cleaner and a separate towel. Mirrors and number plates are checked. A final wipe removes fingerprints and any remaining marks.
Optional Extras That Add Real Value
Beyond the standard wash, there are services designed to lift the finish further. Clay bar treatment removes bonded contaminants that wash alone cannot lift. Spray wax or sealant adds a thin protective layer and boosts gloss. Tyre dressing gives the rubber a clean, even look.
Interior options range from a basic vacuum and wipe to deeper cleaning of seats, carpets and plastics. These extras are not essential for every visit, but they can extend the life of the paint and the cabin.
Signs You Are Getting Quality Work
Standards differ between businesses, so it helps to know what to look for. Clean towels and buckets, separate tools for wheels, and a calm, methodical approach are good signs. A technician who explains what they plan to do before they begin is usually confident in their method.
Check the results with a torch or in good daylight. Streaks on the glass, dried foam in the cracks, or water marks on dark paint show that the finishing stages were rushed. A quality wash leaves no obvious traces behind.
Questions You Can Ask
You can ask which products are used on the paint, whether tools are replaced when they are dropped, and how the team handles bird droppings or sap. These are normal questions, and professionals usually enjoy answering them.
How Long Does a Hand Wash Take and Why?
A thorough exterior wash on an average sedan generally takes from thirty to sixty minutes. Larger vehicles, such as SUVs and vans, can take longer. A very dirty car may need extra rinsing, and cars with ceramic coatings need gentle, careful drying.
The time is not wasted. Each stage removes a different kind of contamination, and shortening any one of them reduces the quality of the finish. If you are planning your day, searching for hand car wash near me and checking opening hours and booking options will help you pick a time that fits.
Common Myths About Hand Washing
One myth says that a hand wash wastes water. In reality, a careful professional wash with a bucket and a controlled rinse can use less water than many automatic systems, especially those that do not recycle.
Another myth says that all hand washes are equal. As you have seen, the tools, products, and order of work make a large difference.
A third myth claims that a hand wash can fix scratches. It cannot. It only prevents new ones.
Final Thoughts
A professional hand wash is a sequence of small decisions made by someone paying attention. Inspection, careful rinsing, foam, a clean contact wash, separate wheel tools, and gentle drying all work together to protect the paint while cleaning it thoroughly. When any step is skipped, the car and your wallet eventually feel it.
If you want to see this process done with care, Goldhand Carwash is a reliable choice. Knowing what a good wash involves makes it easier to spot quality, and it helps your car stay sharp for many more kilometres.
What's Your Reaction?
 Like
0
Like
0
 Dislike
0
Dislike
0
 Love
0
Love
0
 Funny
0
Funny
0
 Angry
0
Angry
0
 Sad
0
Sad
0
 Wow
0
Wow
0