



























Veterinary Surgical Equipment Sterilization and Instrument Reprocessing Considerations
Learn the key sterilization and reprocessing steps for veterinary surgical equipment, from cleaning and inspection to packaging, monitoring and storage.

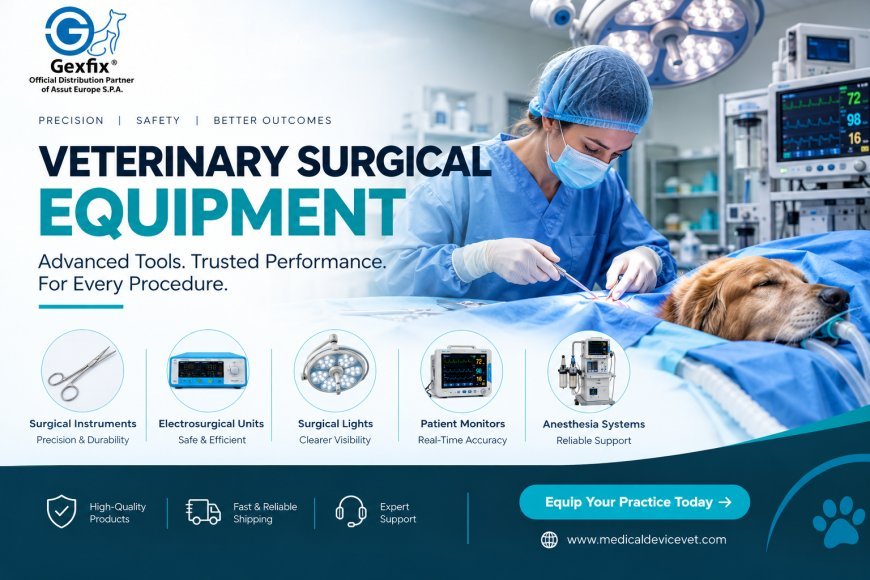
Every surgical procedure depends on tools that are clean, sterile and in working order. Veterinary surgical equipment only supports patient safety when it is handled correctly between uses, and that handling begins the moment a procedure ends. Reprocessing is the full cycle of steps that turns a used item into one that is ready for the next patient. It covers cleaning, inspection, packaging, sterilization and storage. When any step is rushed or skipped the risk of infection rises and the life of the equipment shortens. This guide walks through each stage and explains what clinics should consider when building a dependable reprocessing routine.
Cleaning, Disinfection and Sterilization Are Different Things
These three terms are often used as if they mean the same thing. They do not.
Cleaning removes blood, tissue and other debris using water, detergent and mechanical action. Disinfection reduces the number of harmful microorganisms but may not eliminate all of them. Sterilization destroys all forms of microbial life including bacterial spores, which are the most resistant.
The order matters. Sterilization cannot work properly on an item that is still covered in debris because organic material shields microorganisms from heat and chemicals. Cleaning always comes first. A sterilizer cannot make up for poor cleaning.
Classifying Items by Risk
A common way to decide how an item should be processed is to look at how it will be used.
-
Critical items enter sterile tissue or the bloodstream. Scalpel blades, needle holders and forceps used inside a surgical site belong here and must be sterilized.
-
Semicritical items contact mucous membranes or non intact skin. These need at least high level disinfection and are often sterilized when the item can tolerate it.
-
Noncritical items touch only intact skin such as stethoscopes or clipper bodies. Cleaning and low level disinfection is usually enough.
Most items used during surgery fall into the critical category. Knowing which group an item belongs to prevents both under processing and wasted effort.
Point of Use Care After Surgery
Reprocessing starts at the end of the procedure and not in the sterilization room. Blood and tissue that dry on a surface are much harder to remove later and can cause staining or corrosion.
Good habits at the point of use include:
-
Wiping gross debris from the surface with a damp sponge or gauze
-
Opening hinged items so the box lock and joints can be cleaned
-
Keeping sharp items separate from other tools to protect staff and the cutting edges
-
Placing used items in a container with an enzymatic solution or a moist towel if cleaning cannot happen right away
-
Avoiding saline for soaking since salt can pit stainless steel
These steps take only a minute but make later cleaning faster and safer.
Cleaning Methods
Cleaning is the most important part of reprocessing and also the step most often done poorly.
Manual Cleaning
Manual cleaning uses a soft brush and a neutral pH detergent made for surgical items. The brush should reach into serrations, box locks and any lumens. Items are cleaned under the surface of the water to limit splashing. Abrasive pads and steel wool should be avoided because they scratch the surface and create places where debris and corrosion can start.
Ultrasonic Cleaning
An ultrasonic cleaner uses sound waves to create tiny bubbles that lift debris from hard to reach areas. It is especially helpful for hinged and serrated tools. The solution should be changed regularly since a dirty bath cannot clean well. Hinges should be open and items should not be stacked on top of each other. Dissimilar metals are best kept apart to limit damage.
Rinsing and Drying
Residual detergent can leave a film that affects sterilization and can stain the metal. Rinse thoroughly. A final rinse with distilled or deionized water reduces mineral spots from hard water. Dry items completely before packaging. Moisture trapped inside a pack can lead to wet packs after the cycle and can encourage rust on the metal.
Chemicals to Avoid
Bleach and strong chlorine based solutions can corrode stainless steel. Alcohol based hand rubs or antiseptic solutions left on instruments can leave residue. Always follow the manufacturer instructions for any chemical that touches the equipment.
Inspection and Function Testing
After cleaning and drying each item should be inspected before it goes into a package. Good lighting and a magnifier help. Inspection looks for:
-
Remaining debris in joints or serrations
-
Rust spots or pitting
-
Cracks and bent parts
-
Misaligned tips on forceps and needle holders
-
Dull cutting edges on scissors
-
Stiff or sticking hinges
Damaged items should be pulled from circulation and repaired or replaced. Using worn tools can harm tissue and may make procedures harder for the surgeon. Stiff hinges can often be improved with a water soluble instrument lubricant applied before sterilization. Oils and petroleum based products should not be used because they can block steam contact.
Packaging for Sterilization
Packaging protects items during the cycle and keeps them sterile afterward. The right choice depends on the sterilization method and the type of item.
-
Peel pouches suit single instruments and small items
-
Woven or nonwoven wraps suit larger sets
-
Rigid containers hold full surgical trays and protect sharp edges
Each package should include a chemical indicator inside and an external indicator on the outside. Indicators change color when exposed to the right conditions and show that a package has been through a cycle. They do not prove sterility on their own but they help avoid mix ups between processed and unprocessed items.
Avoid overfilling packs. Steam must reach every surface. Heavy trays or tightly packed items can block penetration and cause wet packs. Place hinged items open and put sharp tips in protective guards if needed.
Sterilization Methods
Several methods are available and the best choice depends on what the item is made of.
Steam Sterilization
Steam under pressure in an autoclave is the most common method in veterinary clinics. It is reliable and fast and leaves no toxic residue. Typical gravity displacement cycles run at about 250 degrees Fahrenheit for around 30 minutes for wrapped items. Prevacuum cycles run hotter at about 270 degrees Fahrenheit for a shorter time. Exact times depend on the sterilizer and the load so the manufacturer instructions should always be followed.
Ethylene Oxide and Hydrogen Peroxide Plasma
Some items cannot tolerate heat or moisture. Ethylene oxide gas and low temperature hydrogen peroxide plasma are used for these heat sensitive materials. Both methods require special equipment and the right packaging. Ethylene oxide also needs a period of aeration to remove gas residue. Many small clinics send these items to an outside processor.
Dry Heat
Dry heat sterilizers use high temperature air and suit some items that steam can damage. The cycles take longer and the method is less common in modern clinics.
Cold Chemical Immersion
Soaking items in a liquid chemical is sometimes used when no other option is available. It is generally considered less reliable for critical items because items cannot be wrapped and are handled after the soak. It is better reserved for emergencies and for items that cannot be sterilized any other way.
Loading and Unloading the Sterilizer
Correct loading supports good steam flow. Place packs on their edge when possible and leave space between them. Put heavier items on the lower shelf so condensation does not drip onto lighter packs. Never stack packs tightly.
When the cycle ends allow the load to cool before handling. Hot packs placed on a cold surface can draw in moisture and become contaminated. Handle packages with clean dry hands and check each one for tears or wet spots before storing it.
Monitoring Sterilization Results
Monitoring confirms that the sterilizer is doing its job. Three types are commonly used together.
-
Mechanical monitors such as gauges and printouts show time temperature and pressure for each cycle
-
Chemical indicators change color when exposed to the right conditions
-
Biological indicators contain bacterial spores and give the most direct evidence that sterilization worked
Biological testing is commonly done at least weekly and is added for loads that include implants. A failed biological test means the equipment and recent loads need to be reviewed before more items are used. Keeping a log of every load supports trace back if a problem appears.
Storage and Shelf Life
Sterile packs remain sterile only while the packaging stays intact and dry. Store them in a clean closed cabinet away from sinks and areas with moisture and dust. Avoid storing packs near vents or on the floor. Handle them as little as possible.
Many facilities use event related shelf life. This means a pack stays sterile until something compromises it such as a tear or moisture. Before opening any pack check the seal and the indicator. A package that is damp or damaged should be reprocessed.
Single Use Items Are Different
Not everything in a surgical room is meant to be reprocessed. Many wound closure products are made for use on one patient and then discarded. A disposable skin stapler arrives sterile and preloaded and is intended for one procedure. Its mechanism is not designed to withstand cleaning and repeated sterilization cycles. Attempting to reprocess it can damage the device and may leave debris inside.
Tissue adhesive is also supplied sterile in small containers and should be used for one patient as well. Opened containers should not be saved for later because the product can cure inside the applicator and contamination becomes possible. The same applies to any surgical glue and to suture material. Following the labeled instructions protects both the patient and the quality of the product.
Checking packaging for damage and expiration dates before use is part of the same safety process. Sterile single use items should be stored in their original packaging until the moment they are needed.
Common Reprocessing Problems
Even careful clinics run into problems. Knowing the usual causes makes them easier to fix.
-
Wet packs are often caused by overloaded trays or insufficient drying and cooling
-
Brown or orange spots can come from rust in the water supply or from damaged items shedding rust onto others
-
White or cloudy film usually points to mineral deposits or detergent residue
-
Stiff hinges suggest incomplete cleaning or lack of lubrication
-
Stained items may indicate chemical residue or poor water quality
Tracking when a problem started helps to identify the cause. A change in detergent or a new water supply or a different load pattern often explains it.
Documentation and Staff Training
A reliable process depends on the people who carry it out. Written procedures help every team member do each step the same way. Records should note the date and load contents and sterilizer settings and the result of any indicators. These records are valuable if a patient develops an infection and the team needs to look back.
Training should cover safe handling of sharp tools and chemicals and the use of protective gear. Staff should also know how to spot a failed cycle and what to do next. Regular refreshers keep standards high as the team changes.
Protecting the Life of Your Equipment
Good reprocessing also protects the investment in veterinary surgical instruments. Proper cleaning and drying reduce corrosion and pitting. Prompt inspection catches small problems before they become failures. Instruments that are rotated through sets evenly wear more slowly than those used constantly. When a tool no longer cuts or grips properly it should be repaired or retired.
Planning for replacement is part of the process. Tracking which items fail most often helps a clinic decide what to stock and when to upgrade. It also helps maintain enough sets so that sterilization cycles do not need to be rushed between cases.
Summary
Sterilization and reprocessing form a chain and each link matters. Prompt point of use care leads to effective cleaning. Cleaning leads to proper inspection and correct packaging and a monitored sterilization cycle. Sound storage then keeps items safe until use. Single use products such as staplers and adhesives sit outside this cycle and follow their own labeling. A clinic that builds clear routines and trains its team well protects patients and extends the life of its veterinary surgical equipment.
Gexfix International Corp. supplies veterinary sutures, skin staplers, skin adhesive and diagnostic tools in partnership with Assut Europe S.P.A.
FAQs
Q: What is the difference between cleaning and sterilization?
A: Cleaning removes visible debris using detergent and water while sterilization destroys all microbial life including spores. Cleaning must come first because leftover debris can protect microorganisms and prevent the sterilization process from working properly.
Q: How often should a clinic test its autoclave?
A: Mechanical and chemical indicators should be checked with every load. Biological indicators are commonly used at least weekly and with loads containing implants. Keeping a written log of results helps the team spot problems quickly.
Q: Can disposable surgical products be reprocessed?
A: Single use items such as disposable staplers and adhesive containers are made for one patient. Their mechanisms and materials are not designed for repeated cleaning and sterilization, so they should be discarded after use.
Q: What causes wet packs after a steam cycle?
A: Wet packs usually come from overloaded trays, items that were not fully dry or packs handled before cooling. Leaving space between packs and allowing a full cooling period reduces the problem.
Q: Why do instruments develop rust spots?
A: Rust spots can come from residue left on the surface, poor water quality, harsh chemicals or damaged plating. Thorough rinsing and drying and the use of distilled water for the final rinse help prevent them.
What's Your Reaction?
 Like
0
 Dislike
0
 Love
0
 Funny
0
 Angry
0
 Sad
0
 Wow
0